A joystick may be used by persons with motor related disabilities as an alternative method of navigating a mouse. Mouse clicks may occur through a button press usually available in most mini joystick models. A user may also set a dwell duration through their operating system which will register a mouse click once the mouse rests in a location for a set time. Alternatively, this project may be adapted to include an audio jack output which would allow the user to connect their own custom switches for mouse clicks.
This project uses the Adafruit QTpy board and Circuit Python and is a beginner friendly build. The QTPy, is a low cost development board running the SAMD21 chip and supports HID libraries for keyboard and mouse emulation. CiruitPython, developed by Adafruit, is an off shoot of Micropython and created for the purpose of lowering the entry barrier to working with microcontrollers. This project may also be completed using the Arduino IDE.
Now let’s get to building!
Materials:
- Adafruit QTPy board
- Mini Joystick
- USB C cable (ensure this is a data transfer cable and not charge only)
- Joystick Case Printed Parts
- (1) Base
- (1) Top
- (4) 6-32 3/16″ screws
- (4) 6-32 1/2″ screws
- (5) Socket- Socket header cables
- Soldering Iron + Solder
Prep
Solder the headers
The QTPy comes headerless (the pins are not soldered into the board). You will need to solder the pins into the board for easier access. Adafruit has a great beginner video on how to solder headers.
Print the Case
Wire the board and joystick

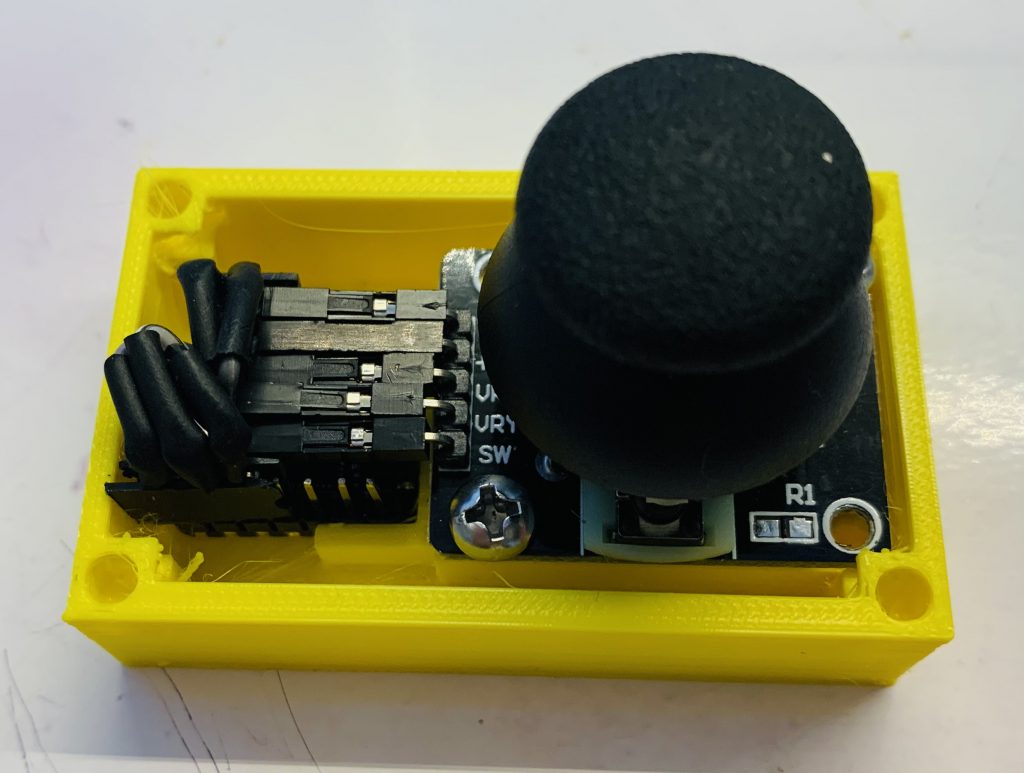
Using the socket to socket wires, connect the joystick pins to the board header pins. Note, you may benefit from cutting and shortening the wires to save space within the case. Wire the following pins:
- GND to GND
- 5V to 3V
- VRX to A0 (pin for the X reading)
- VRY to A1 (pin for the Y reading)
- SW to A2 (pin for the button)
Insert the board and joystick into the case and screw the joystick and cover

Working with the code
This project uses CircuitPython so you will need to install both the .uf2 file for the board as well as the HID libraries for sending key strokes to the computer.
Install the CircuitPython .uf2 file
Head over the the CircuitPython website and download the most current version of CP for this board. This tutorial is using 6.0.1.
Plugin the USB to your computer and press the reset button twice. You should now see a “QTPY_BOOT” drive visible.
Drag the .uf2 file (most likely from your downloads folder) into the drive. You will see a quick flash and the drive will reboot. You should now see the drive as “CIRCUITPY” drive.
Download and Install the HID Library
This project uses an additional library which will need to be downloaded and installed from the CP library website. You may download the CP Library Bundle which includes our needed HID library. Be sure to select the bundle version that matches the CP version you are using. For this tutorial, the 6.x version was downloaded and unzipped.
On your “CIRCUITPY” drive within the “lib” folder, create a new folder titled “adafruit_hid”. From the downloaded and unzipped library folder (most likely in your downloads folder), locate the “adafuit_hid” folder and copy/paste the __init__.mpy and mouse.mpy files into the QTpy folder.

Create the code.py file
CP looks for a code.py file upon completing the boot sequence and runs the code provided within this file. If you already have a code editor program of your choice, you may copy and paste the code below and save it to the “CIRCUITPY” drive. Note, the code the will execute a few seconds after the file is saved. Provide enough time for the action to complete.
If you have not worked with code before nor have a code editor of your choice, Adafruit provides a great step by step tutorial on how to get started using the beginner friendly MU editor. Visit their tutorial here.
Customizing your Code
If you would like to adjust the sensitivity of the joystick, try and edit the various x and y conditionals seen in line 45 and below. A step reading of 10 is the center therefore if the x reading is more than 11 the mouse will move 1 pixel to the right (positive). If the reading is 9, it will move the mouse 1 pixel to the left (negative).
if steps(x) > 11.0:
        print(steps(x))
        mouse.move(x=1)
    if steps(x) < 9.0:
        print(steps(x))
        mouse.move(x=-1)
The other conditional statements are used to move the mouse a larger number of pixels as the x and y readings verge away from center reading of 10.
Testing it Out
Connect the joystick and test it out! You may adjust the responsiveness of the mouse and click settings using the computer’s operating system settings.


