
The MakeCode integrated development environment (IDE) created by Microsoft is a great platform for learning computer science starting with beginner friendly block based coding and transitioning to language based programming. It is web based and open sourced, lowering the entry bar.
Many flavors of MakeCode exist depending on your teaching objectives these include:
- Micro:bit– programming the micro:bit microcontroller
- Arcade– programming pixel based arcade games supported by a wide range of hardware options
- Maker– programming a growing list of microcontrollers
- Minecraft– programming mods and scripts within the MinecraftEDU environment.
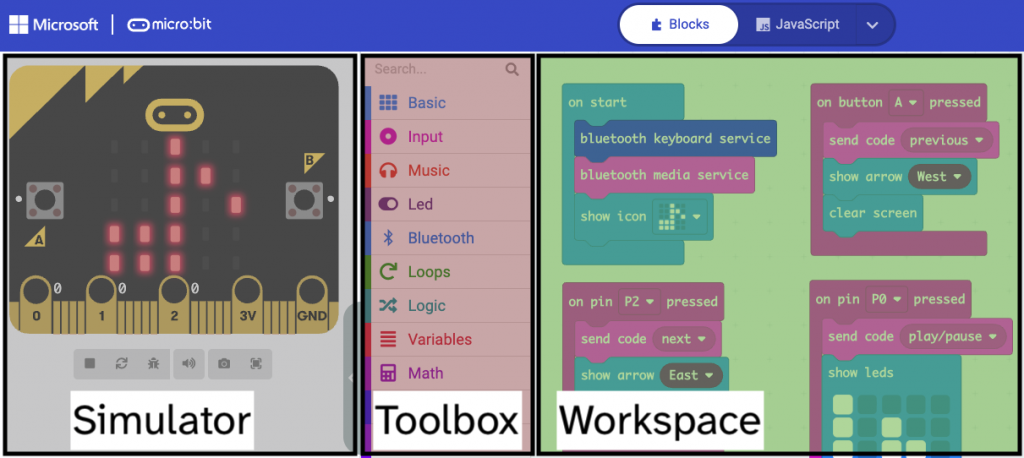
The IDE generally provides a three main areas: the simulator, toolbox, and workspace.
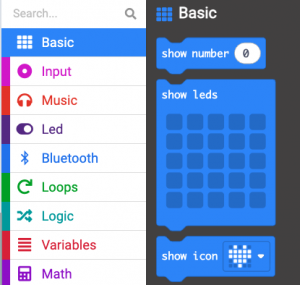
The MakeCode Toolbox is broken down into color coded categories with corresponding color coded blocks for each function.
The default editor presents the user with the full set of categories and all blocks. This provides for free exploration and advanced usage.
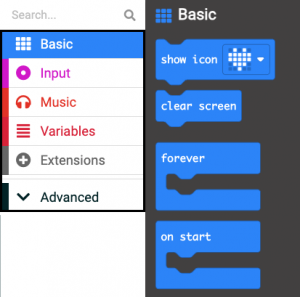
It is possible, to present a more pared down version of a MakeCode editor limiting the visibility of menus and blocks based on the lesson objectives and age ranges. Presenting this kind environment may not only be beneficial for beginners but may also help support users with disabilities who rely on assistive technology tools.
Benefits for Accessibility and Navigation
A limited toolbox offers advantages for users of assistive technologies and generally improves ease of navigation for all students.
- Improved Screen Reader Experience: For users relying on screen readers (which read the on-screen elements), a smaller toolbox means fewer items to tab through and listen to. This reduces the auditory burden and makes the required blocks much faster to locate.
- Easier Motor Navigation (Tabbing): Users who navigate the interface using only a keyboard (by key pressing through elements) benefit as well. A smaller set of visible blocks decreases the number of key presses required to reach the desired code block, making the process of building a program more efficient and less physically demanding.
- Reduced Visual Clutter: A limited, curated set of blocks creates a cleaner, less distracting interface. This is particularly helpful for students with ADHD, dyslexia, or certain visual processing difficulties, allowing them to focus on the task and the logic, rather than a dense, visually overwhelming menu.
- Reduces Cognitive Load: By restricting the number of available blocks or commands, instructors focus the student’s attention on the specific concepts being taught (e.g., loops, variables, or sprites). This prevents learners from becoming overwhelmed by the complexity of a full toolbox, allowing them to master foundational principles before moving to advanced topics.
How to Create a Simplified Toolbox
Creating this environment involves modification of the pxt.json file that becomes accessible in the Explorer menu when navigating to the text based environments. Here, adding a toolboxFilter object allows you to list the blockID and namespaces (menu items) you would like to hide.
A sample pxt.json file is provided by Kirsty McNaught. Thank you!
A list of blockID and namespaces is available here.
"toolboxFilter": {
        "Extensions": "hidden",
        "blocks": {
// list blockIDs here. Example:
            "device_print_message": "hidden"
        },
        "namespaces": {
//list menu categories here. Example:
            "logic": "hidden",
        }
    }
A walkthrough video of how to complete this process is available here: